How To: Cross-Platform C++ with CMake Presets, vcpkg, and Dev Containers
Written by, Funnan on April 11, 2026
Updated May 2026 with the companion livestream video.
The video above is the full livestream where this project was built end-to-end — this post is the written companion you can scan, copy from, and link to.
Most C++ projects start on one platform and stay there longer than intended. The build works on your machine, the CI story is “we’ll figure it out later,” and cross-platform support means someone eventually opens an Issue asking if it builds on Linux.
This guide walks through setting up a C++ project that compiles on Windows, Linux, macOS, WebAssembly, and Android from the start — using CMake presets, vcpkg, Ninja, and VS Code Dev Containers. The approach is incremental: start with a hello-world on Windows, expand to Linux in a container, add a graphics dependency, then target the browser, mobile, and macOS.
The full source is on GitHub at funnansoftware/cmake-platforms. Each commit corresponds roughly to a section of this guide, so you can follow along step by step.
This guide is incremental — each step builds on the previous one. If you’re jumping to a specific platform for reference, the earlier sections establish the project structure and preset architecture that later steps depend on.
Contents
- Hello World on Windows — MSVC, Ninja, and CMake preset architecture
- Linux via Dev Container — GCC, Clang, and Dockerfile setup
- Adding vcpkg for Dependencies — manifest mode and toolchain integration
- Hello Triangle on Windows — Raylib through vcpkg
- Hello Triangle on Linux — X11/GLFW in the container
- WebAssembly — Emscripten cross-compilation
- Android — NDK, Gradle, and APK builds
- macOS — Homebrew LLVM on Apple Silicon
What You’ll Need
The philosophy of this project is that the Dev Container is the development environment. You install very little on the host — just what’s needed to run VS Code, talk to Docker, and (optionally) produce a native build for your OS. Everything else lives inside the container.
Common to every host
- VS Code — code.visualstudio.com
- Dev Containers extension —
ms-vscode-remote.remote-containers - CMake Tools extension —
ms-vscode.cmake-tools - Git — git-scm.com
- Docker — the Docker engine that the Dev Containers extension will connect to (Docker Desktop is fine; on Linux a native Docker engine works too)
Per-host extras (only for native builds on that OS)
You only need these if you want to build natively on that platform. If you’re happy doing everything inside the Dev Container, the common list above is enough.
- Windows (for the native MSVC build in Step 1 and Step 4):
- Visual Studio 2022 with the Desktop development with C++ workload (gives you MSVC, the Windows SDK, and
cl.exe) - CMake 3.31+ — included with Visual Studio, or standalone from cmake.org
- Ninja —
winget install Ninja-build.Ninjaor ninja-build.org - WSL2 — for running Docker. Install with
wsl --installfrom an elevated PowerShell, then follow the Docker Engine docs for Ubuntu to install Docker inside your WSL2 distro.
- Visual Studio 2022 with the Desktop development with C++ workload (gives you MSVC, the Windows SDK, and
- macOS (for the native Apple-Silicon build in Step 8):
- Xcode Command Line Tools —
xcode-select --install - Homebrew — brew.sh
brew install llvm@22 cmake ninja
- Xcode Command Line Tools —
- Linux (for native GCC/Clang builds outside the container):
- The Docker engine, plus your distro’s
cmake,ninja-build, andgitpackages.
- The Docker engine, plus your distro’s
Everything else is inside the Dev Container. GCC 15, Clang 22, Emscripten, OpenJDK 17, the Android SDK + NDK r29, Gradle 9.4.1, and the X11/OpenGL development libraries are all installed automatically by
.devcontainer/Dockerfile. Do not install these on your host.
Step 1: Hello World on Windows
Start with the simplest possible CMake project. Create a new directory and initialize it:
cmake-platforms/
├── CMakeLists.txt
├── CMakePresets.json
├── app/
│   ├── CMakeLists.txt
│   └── main.cpp
└── .vscode/
    └── settings.json
The root CMakeLists.txt sets the C++ standard and adds the app subdirectory:
cmake_minimum_required(VERSION 3.31)

set(CMAKE_CXX_STANDARD 23)
set(CMAKE_CXX_STANDARD_REQUIRED ON)
set(CMAKE_CXX_EXTENSIONS OFF)

project(cmake-platforms)

add_subdirectory(app)
The app target is a straightforward executable:
# app/CMakeLists.txt
project(hello-world)

add_executable(${PROJECT_NAME})

target_sources(${PROJECT_NAME}
    PRIVATE
        main.cpp
)
// app/main.cpp
#include <print>
auto main() -> int
{
std::println("Hello, World!");
return 0;
}CMake Presets — The Key Idea
Instead of passing flags on the command line every time, CMake presets let you define named configurations in JSON. The root CMakePresets.json includes platform-specific preset files:
{
    "version": 7,
    "include": [
        "./cmake/platform/windows.json"
    ]
}
The preset architecture uses composition. Small, reusable JSON fragments are defined for the compiler, generator, build type, and vcpkg integration, then composed into platform presets via inherits. Here’s the structure:
cmake/
├── compiler/
│   └── msvc.json
├── config/
│   ├── binaryDir.json
│   ├── debug.json
│   ├── ninja.json
│   └── release.json
└── platform/
    └── windows.json
The MSVC compiler fragment sets the compiler and warning flags:
{
    "version": 7,
    "configurePresets": [
        {
            "name": "compiler-msvc",
            "hidden": true,
            "cacheVariables": {
                "CMAKE_EXPORT_COMPILE_COMMANDS": true,
                "CMAKE_CXX_COMPILER": "cl",
                "CMAKE_C_COMPILER": "cl",
                "CMAKE_CXX_FLAGS": "/MP /permissive- /W4 /WX /EHsc /Zc:preprocessor"
            }
        }
    ]
}
The Ninja generator fragment is even simpler:
{
    "version": 7,
    "configurePresets": [
        {
            "name": "config-ninja",
            "hidden": true,
            "generator": "Ninja"
        }
    ]
}
The Windows platform file composes these fragments into concrete presets:
{
    "version": 7,
    "include": [
        "../compiler/msvc.json",
        "../config/binaryDir.json",
        "../config/debug.json",
        "../config/ninja.json",
        "../config/release.json"
    ],
    "configurePresets": [
        {
            "name": "x64-windows-msvc-debug",
            "inherits": [
                "compiler-msvc",
                "config-binaryDir",
                "config-debug",
                "config-ninja"
            ]
        },
        {
            "name": "x64-windows-msvc-release",
            "inherits": [
                "compiler-msvc",
                "config-binaryDir",
                "config-ninja",
                "config-release"
            ]
        }
    ],
    "buildPresets": [
        {
            "name": "x64-windows-msvc-debug",
            "configurePreset": "x64-windows-msvc-debug"
        },
        {
            "name": "x64-windows-msvc-release",
            "configurePreset": "x64-windows-msvc-release"
        }
    ]
}
Building
Open a Developer Command Prompt for VS 2022 (or run vcvarsall.bat amd64 in your terminal) so that cl.exe and the Windows SDK are on the path. Then:
cmake --preset x64-windows-msvc-debug
cmake --build --preset x64-windows-msvc-debug
That’s it. The binary lands in build/x64-windows-msvc-debug/. The preset name is the only thing you need to remember — no flags, no generator arguments, no manual paths.
Run it and you should see:
> .\build\x64-windows-msvc-debug\app\hello-world.exe
Hello, World!
Add a .vscode/settings.json to keep CMake Tools from interfering with the preset workflow:
{
    "editor.formatOnSave": true,
    "cmake.configureOnOpen": false,
    "cmake.configureOnEdit": false
}
Step 2: Linux via Dev Container
With Windows working, the next step is Linux — without leaving your Windows machine. This is where Dev Containers become valuable.
Create a .devcontainer/ directory with a Dockerfile and devcontainer.json:
.devcontainer/
├── Dockerfile
└── devcontainer.json
The devcontainer.json tells VS Code how to build and configure the container:
{
    "name": "cmake-platforms",
    "build": {
        "dockerfile": "Dockerfile"
    },
    "customizations": {
        "vscode": {
            "extensions": [
                "ms-vscode.cmake-tools"
            ]
        }
    }
}
The Dockerfile starts from Ubuntu 25.10 and installs GCC 15 and Clang 22 alongside CMake and Ninja:
FROM ubuntu:25.10

ENV DEBIAN_FRONTEND=noninteractive

# Base utilities and build tooling.
RUN apt-get update && apt-get install -y --no-install-recommends \
    ca-certificates \
    curl \
    git \
    make \
    cmake \
    ninja-build \
    pkg-config \
    python3 \
    zip \
    unzip \
    xz-utils \
    tar \
    && rm -rf /var/lib/apt/lists/*

# GCC 15.
RUN apt-get update && apt-get install -y --no-install-recommends \
    gcc-15 \
    g++-15 \
    && rm -rf /var/lib/apt/lists/* \
    && update-alternatives --install /usr/bin/gcc gcc /usr/bin/gcc-15 100 \
    && update-alternatives --install /usr/bin/g++ g++ /usr/bin/g++-15 100

# Add the official LLVM apt repository.
RUN curl -fsSL https://apt.llvm.org/llvm-snapshot.gpg.key \
    -o /usr/share/keyrings/llvm-apt-key.asc \
    && . /etc/os-release \
    && echo \
    "deb [signed-by=/usr/share/keyrings/llvm-apt-key.asc] http://apt.llvm.org/${UBUNTU_CODENAME}/ llvm-toolchain-${UBUNTU_CODENAME}-22 main" \
    > /etc/apt/sources.list.d/llvm-22.list

# Clang 22.
RUN apt-get update && apt-get install -y --no-install-recommends \
    clang-22 \
    clang-format-22 \
    clang-tidy-22 \
    clangd-22 \
    lld-22 \
    && rm -rf /var/lib/apt/lists/* \
    && update-alternatives --install /usr/bin/clang clang /usr/bin/clang-22 100 \
    && update-alternatives --install /usr/bin/clang++ clang++ /usr/bin/clang++-22 100 \
    && update-alternatives --install /usr/bin/clang-format clang-format /usr/bin/clang-format-22 100 \
    && update-alternatives --install /usr/bin/clang-tidy clang-tidy /usr/bin/clang-tidy-22 100 \
    && update-alternatives --install /usr/bin/clangd clangd /usr/bin/clangd-22 100 \
    && update-alternatives --install /usr/bin/lld lld /usr/bin/lld-22 100 \
    && update-alternatives --install /usr/bin/run-clang-tidy run-clang-tidy /usr/bin/run-clang-tidy-22 100 \
    && update-alternatives --install /usr/bin/clang-tidy-diff clang-tidy-diff /usr/bin/clang-tidy-diff-22.py 100
Linux Compiler Fragments
Add GCC and Clang preset fragments alongside the existing MSVC one:
// cmake/compiler/gcc.json
{
    "version": 7,
    "configurePresets": [
        {
            "name": "compiler-gcc",
            "hidden": true,
            "cacheVariables": {
                "CMAKE_EXPORT_COMPILE_COMMANDS": true,
                "CMAKE_CXX_COMPILER": "g++",
                "CMAKE_C_COMPILER": "gcc",
                "CMAKE_CXX_FLAGS": "-Wall -Wextra -Werror -pedantic"
            }
        }
    ]
}
// cmake/compiler/clang.json
{
"version": 7,
"configurePresets": [
{
"name": "compiler-clang",
"hidden": true,
"cacheVariables": {
"CMAKE_EXPORT_COMPILE_COMMANDS": true,
"CMAKE_CXX_COMPILER": "clang++",
"CMAKE_C_COMPILER": "clang",
"CMAKE_CXX_FLAGS": "-Wall -Wextra -Werror -pedantic"
}
}
]
}The Linux platform file composes four presets — GCC and Clang in Debug and Release:
{
    "version": 7,
    "include": [
        "../compiler/clang.json",
        "../compiler/gcc.json",
        "../config/binaryDir.json",
        "../config/debug.json",
        "../config/ninja.json",
        "../config/release.json"
    ],
    "configurePresets": [
        {
            "name": "x64-linux-gcc-debug",
            "inherits": ["config-binaryDir", "config-debug", "config-ninja", "compiler-gcc"]
        },
        {
            "name": "x64-linux-gcc-release",
            "inherits": ["config-binaryDir", "config-release", "config-ninja", "compiler-gcc"]
        },
        {
            "name": "x64-linux-clang-debug",
            "inherits": ["config-binaryDir", "config-debug", "config-ninja", "compiler-clang"]
        },
        {
            "name": "x64-linux-clang-release",
            "inherits": ["config-binaryDir", "config-release", "config-ninja", "compiler-clang"]
        }
    ]
}
Update the root CMakePresets.json to include the Linux platform:
{
    "version": 7,
    "include": [
        "./cmake/platform/linux.json",
        "./cmake/platform/windows.json"
    ]
}
Using the Dev Container
In VS Code, open the Command Palette and run Dev Containers: Reopen in Container. VS Code builds the Docker image from the Dockerfile, starts a container, and reconnects the editor inside it. Your workspace is mounted automatically.
Once inside the container, you have full access to GCC and Clang. Build with:
cmake --preset x64-linux-gcc-debug
cmake --build --preset x64-linux-gcc-debug
Or switch to Clang:
cmake --preset x64-linux-clang-debug
cmake --build --preset x64-linux-clang-debug
The same preset-based workflow works identically on every platform. That’s the point.
Step 3: Adding vcpkg for Dependencies
Before moving to a graphical hello-triangle, the project needs a dependency manager. vcpkg integrates cleanly with CMake presets.
Add vcpkg as a Git submodule:
git submodule add https://github.com/microsoft/vcpkg.gitBootstrap it on your current platform:
:: Windows
.\vcpkg\bootstrap-vcpkg.bat
# Linux (inside Dev Container)
./vcpkg/bootstrap-vcpkg.shCreate a vcpkg.json manifest in the project root to declare dependencies:
{
    "name": "cmake-platforms",
    "version-string": "2026.4.10",
    "port-version": 1,
    "description": "CMake presets for various platforms and configurations.",
    "homepage": "https://github.com/funnansoftware/cmake-platforms",
    "dependencies": [
        "raylib"
    ]
}
Add a vcpkg config fragment that tells CMake to use vcpkg’s toolchain:
// cmake/config/vcpkg.json
{
    "version": 7,
    "configurePresets": [
        {
            "name": "config-vcpkg",
            "hidden": true,
            "toolchainFile": "${sourceDir}/vcpkg/scripts/buildsystems/vcpkg.cmake"
        }
    ]
}
Then add "config-vcpkg" to the inherits list in every platform preset. The Windows debug preset becomes:
{
    "name": "x64-windows-msvc-debug",
    "inherits": [
        "compiler-msvc",
        "config-binaryDir",
        "config-debug",
        "config-ninja",
        "config-vcpkg"
    ]
}
Now when you run cmake --preset x64-windows-msvc-debug, vcpkg automatically installs Raylib (and any transitive dependencies) before the configure step completes. No manual vcpkg install needed.
Step 4: Hello Triangle on Windows
Replace the hello-world app with a Raylib triangle. Update the app directory structure:
app/
└── hello-triangle/
    ├── CMakeLists.txt
    └── main.cpp
The root app/CMakeLists.txt becomes a simple subdirectory include:
add_subdirectory(hello-triangle)The hello-triangle CMakeLists finds Raylib through vcpkg’s package config:
project(hello-triangle)

add_executable(${PROJECT_NAME})

target_sources(${PROJECT_NAME}
    PRIVATE
        main.cpp
)

find_package(raylib CONFIG REQUIRED)

target_link_libraries(${PROJECT_NAME} PRIVATE
    raylib
)
And the application code:
#include <print>

#include <raylib.h>

auto main() -> int
{
    InitWindow(800, 600, "Hello, Triangle");

    while (!WindowShouldClose())
    {
        BeginDrawing();
        ClearBackground(GRAY);
        DrawTriangle(Vector2{400, 100}, Vector2{300, 300}, Vector2{500, 300}, ORANGE);
        EndDrawing();
    }

    CloseWindow();

    return EXIT_SUCCESS;
}
Build and run from a Developer Command Prompt:
cmake --preset x64-windows-msvc-debug
cmake --build --preset x64-windows-msvc-debug
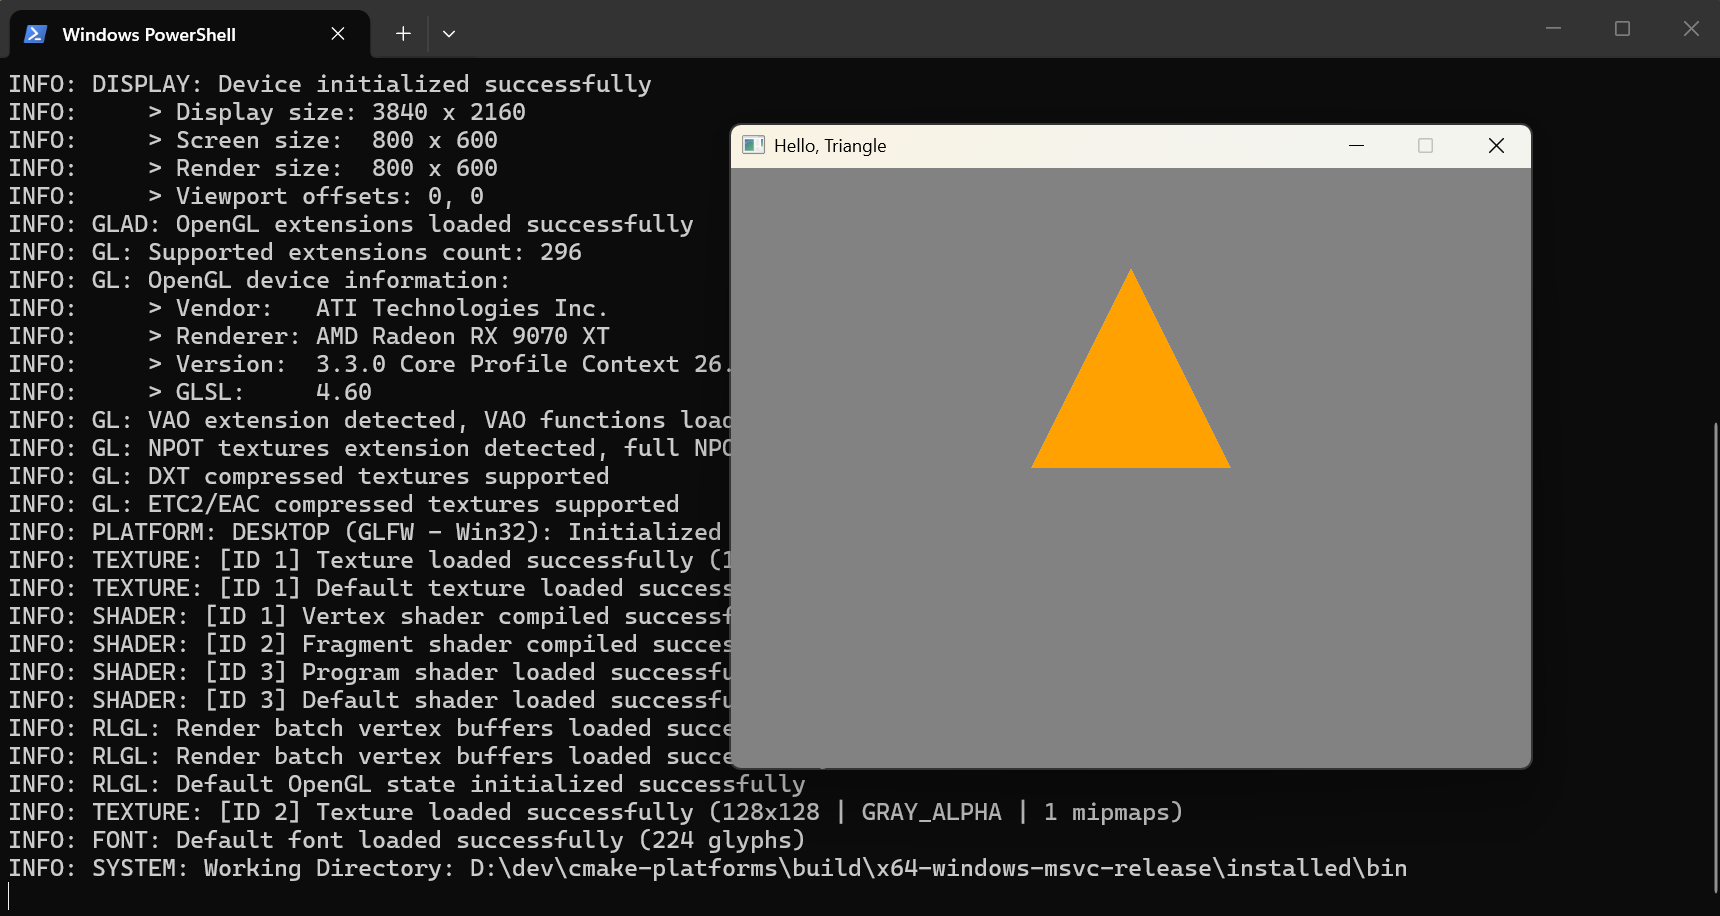
.\build\x64-windows-msvc-debug\app\hello-triangle\hello-triangle.exeYou should see a window with an orange triangle on a gray background.
Step 5: Hello Triangle on Linux
Getting the graphical app running in the Dev Container requires a few additions.
First, add the X11/OpenGL development libraries to the Dockerfile so Raylib and GLFW can compile from source via vcpkg:
# Raylib
RUN apt-get update && apt-get install -y \
    libxinerama-dev libxcursor-dev \
    xorg-dev libglu1-mesa-dev pkg-config
The project also needs GLFW as an explicit dependency on Linux. Update vcpkg.json:
{
    "dependencies": [
        "raylib",
        {
            "name": "glfw3",
            "platform": "!emscripten"
        }
    ]
}
And link it in the CMakeLists:
find_package(glfw3 CONFIG REQUIRED)
find_package(raylib CONFIG REQUIRED)

target_link_libraries(${PROJECT_NAME} PRIVATE
    raylib
    glfw
)
Add host and target triplet fragments so vcpkg builds for the right platform:
// cmake/host/x64-linux.json
{
    "version": 7,
    "configurePresets": [
        {
            "name": "host-x64-linux",
            "hidden": true,
            "condition": {
                "type": "equals",
                "lhs": "${hostSystemName}",
                "rhs": "Linux"
            }
        }
    ]
}
// cmake/target/x64-linux.json
{
"version": 7,
"configurePresets": [
{
"name": "target-x64-linux",
"hidden": true,
"cacheVariables": {
"VCPKG_TARGET_TRIPLET": "x64-linux"
}
}
]
}Include these in the Linux platform preset’s inherits list, rebuild the Dev Container to pick up the new system packages, and build:
cmake --preset x64-linux-clang-debug
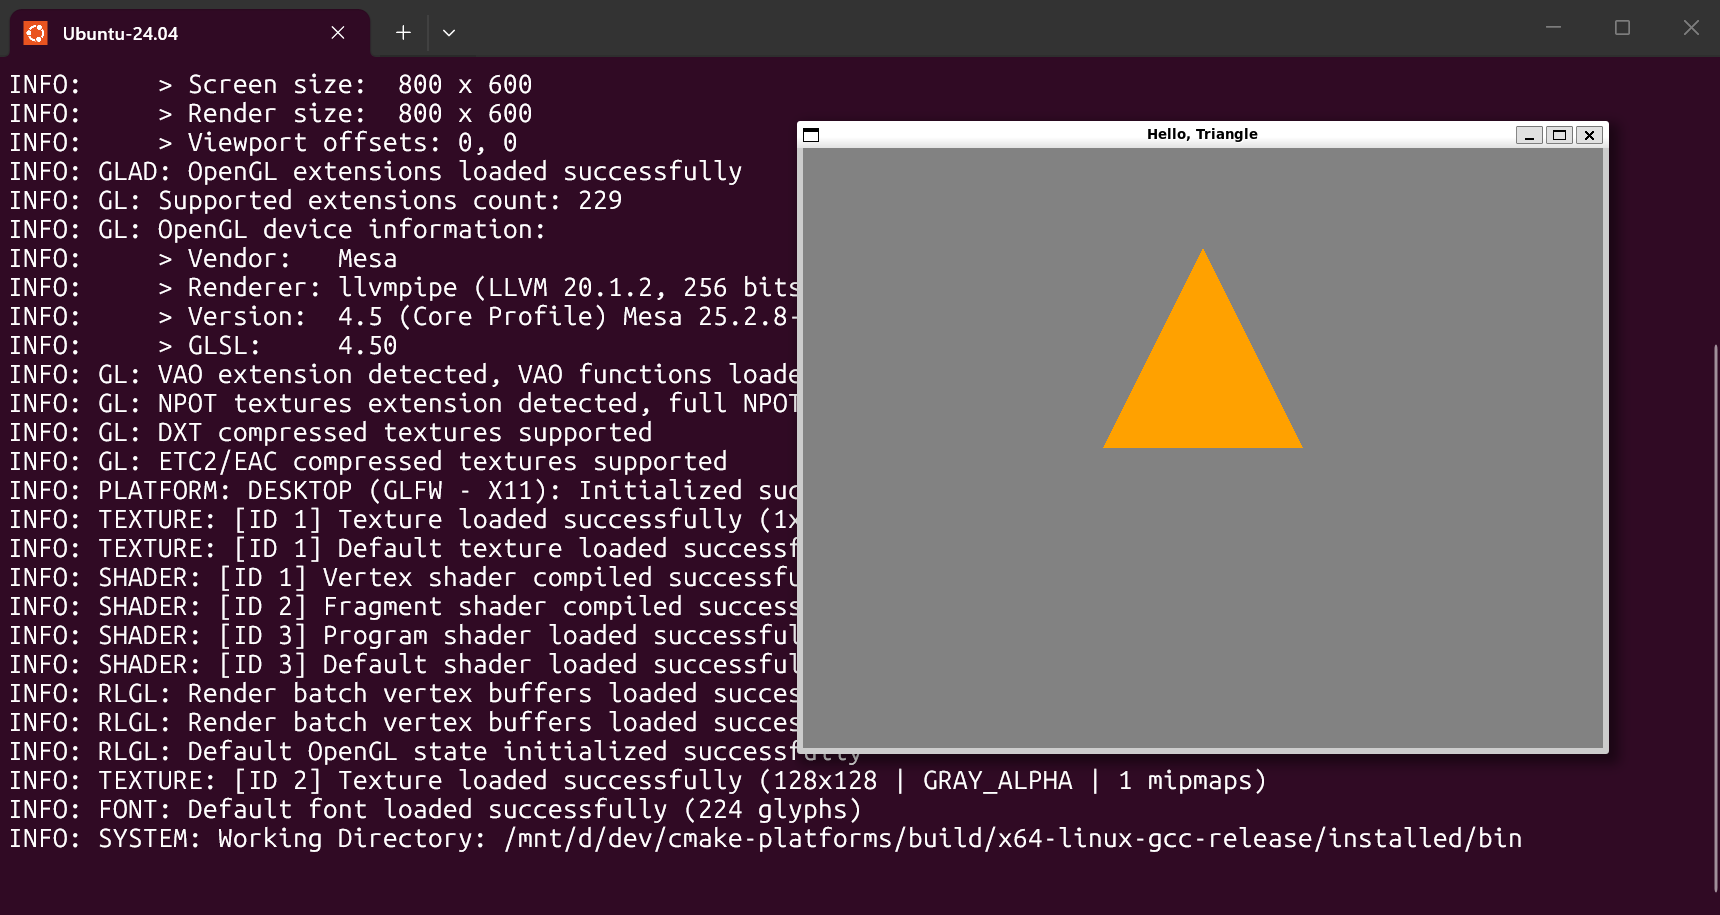
cmake --build --preset x64-linux-clang-debugThe binary compiles inside the container. To actually run the graphical app, you’ll need X11 forwarding or to copy the binary out — but the important thing is the cross-platform build works.
Step 6: WebAssembly
Targeting the browser means cross-compiling with Emscripten. Add it to the Dev Container Dockerfile:
# Emscripten.
ARG EMSDK_VERSION=latest
RUN git clone https://github.com/emscripten-core/emsdk.git /opt/emsdk \
    && /opt/emsdk/emsdk install ${EMSDK_VERSION} \
    && /opt/emsdk/emsdk activate ${EMSDK_VERSION} \
    && nodeBin="$(find /opt/emsdk/node -type f -path '*/bin/node' | head -n 1)" \
    && test -n "${nodeBin}" \
    && ln -sf "${nodeBin}" /usr/local/bin/node

ENV EMSDK=/opt/emsdk
ENV EMSCRIPTEN_ROOT=/opt/emsdk/upstream/emscripten
ENV PATH=${EMSDK}:${EMSCRIPTEN_ROOT}:${PATH}
Emscripten Compiler Preset
Create an Emscripten compiler fragment. The key detail is setting CMAKE_TOOLCHAIN_FILE to Emscripten’s platform module:
// cmake/compiler/emcc.json
{
    "version": 7,
    "configurePresets": [
        {
            "name": "compiler-emcc",
            "hidden": true,
            "cacheVariables": {
                "CMAKE_EXPORT_COMPILE_COMMANDS": true,
                "CMAKE_CXX_COMPILER": "emcc++",
                "CMAKE_C_COMPILER": "emcc",
                "CMAKE_TOOLCHAIN_FILE": "$env{EMSDK}/upstream/emscripten/cmake/Modules/Platform/Emscripten.cmake"
            }
        }
    ]
}
Add a target triplet fragment and a WebAssembly platform file that composes everything into presets named wasm32-emscripten-debug and wasm32-emscripten-release.
CMakeLists Changes
The hello-triangle CMakeLists needs platform branching for Emscripten. GLFW is provided by Emscripten itself via -sUSE_GLFW=3, so you don’t link it through vcpkg. The output format changes to .html:
if(EMSCRIPTEN)
    set(raylib_USE_STATIC_LIBS ON)

    target_link_options(${PROJECT_NAME}
        PRIVATE
            -sUSE_GLFW=3
            -sASYNCIFY
    )

    set_target_properties(${PROJECT_NAME} PROPERTIES SUFFIX ".html")

    install(FILES
        ${CMAKE_CURRENT_BINARY_DIR}/${PROJECT_NAME}.html
        ${CMAKE_CURRENT_BINARY_DIR}/${PROJECT_NAME}.js
        ${CMAKE_CURRENT_BINARY_DIR}/${PROJECT_NAME}.wasm
        DESTINATION web
    )
else()
    find_package(glfw3 CONFIG REQUIRED)
    target_link_libraries(${PROJECT_NAME} PRIVATE glfw)
endif()
Update vcpkg.json so GLFW is excluded on Emscripten:
{
    "name": "glfw3",
    "platform": "!emscripten"
}
Build in the Dev Container:
cmake --preset wasm32-emscripten-debug
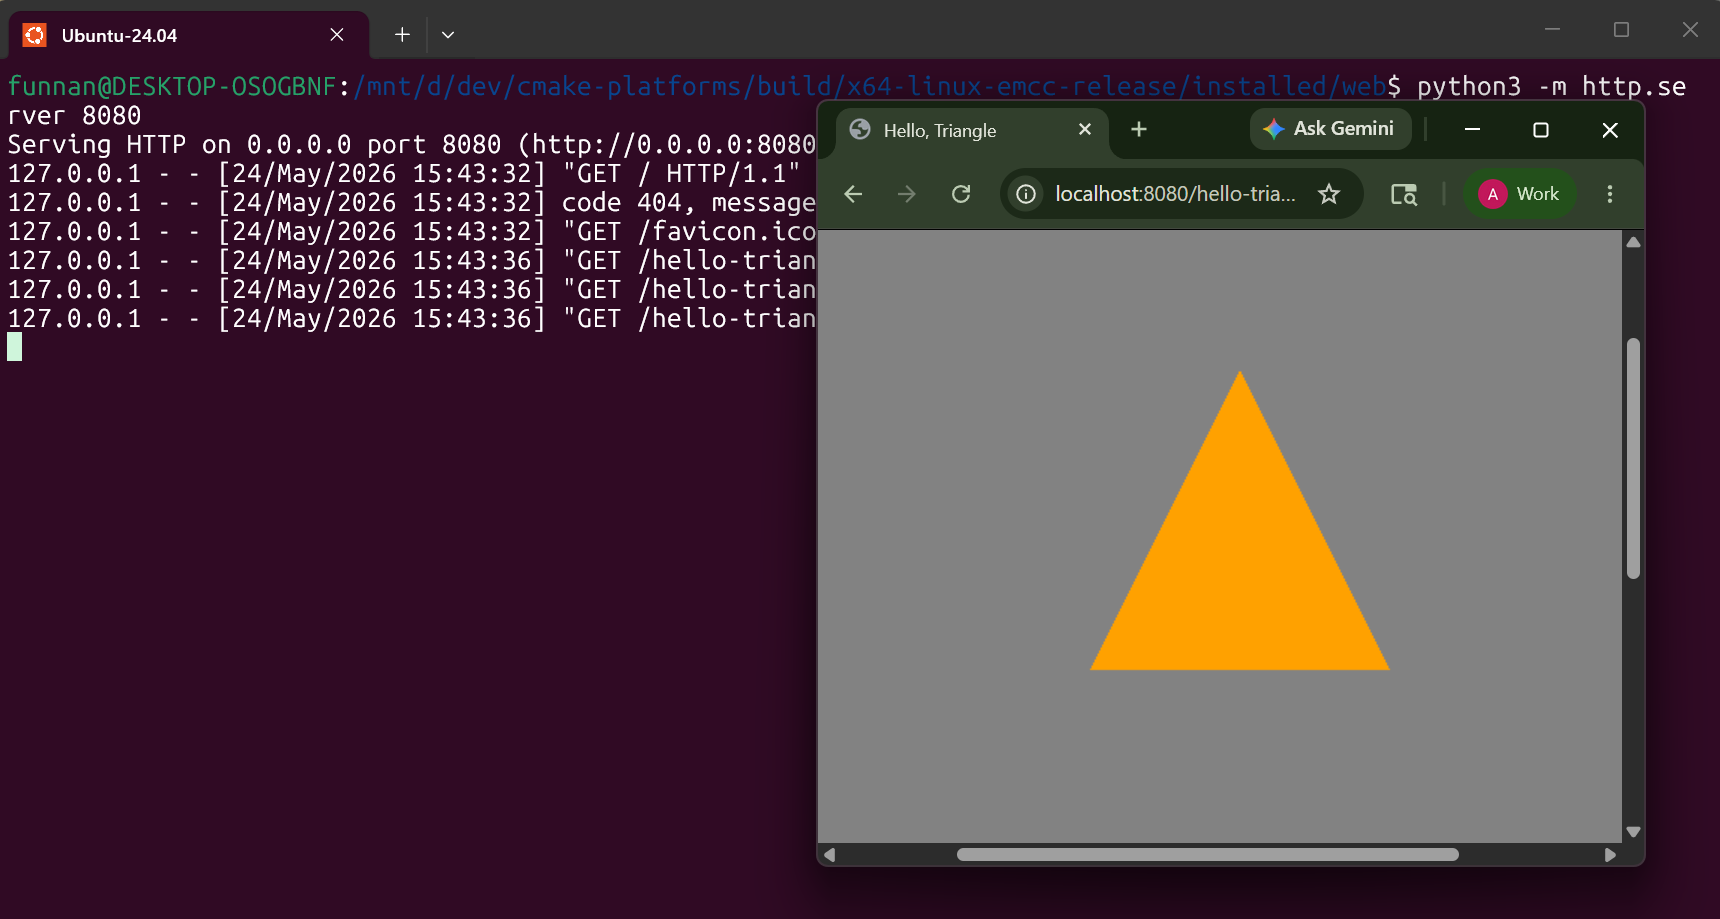
cmake --build --preset wasm32-emscripten-debugThe output is an .html file alongside .js and .wasm. Serve it locally (the Live Server VS Code extension works well for this) and open a browser to see the triangle running in WebAssembly.
Add ms-vscode.live-server to the devcontainer.json extensions to make this convenient:
{
    "customizations": {
        "vscode": {
            "extensions": [
                "ms-vscode.cmake-tools",
                "ms-vscode.live-server"
            ]
        }
    }
}
Step 7: Android
Android is the most involved target. It requires the NDK, SDK, Gradle, and a JDK — all of which go into the Dev Container.
Dockerfile Additions
# Java (required by Gradle and Android SDK).
RUN apt-get update && apt-get install -y \
    openjdk-17-jdk \
    usbutils \
    && rm -rf /var/lib/apt/lists/*

ENV JAVA_HOME=/usr/lib/jvm/java-17-openjdk-amd64

# Android SDK command line tools.
RUN mkdir -p /opt/android/sdk \
    && curl -fsSLo /tmp/commandlinetools.zip \
    https://dl.google.com/android/repository/commandlinetools-linux-14742923_latest.zip \
    && unzip -qq /tmp/commandlinetools.zip -d /opt/android/sdk \
    && rm -f /tmp/commandlinetools.zip

ENV ANDROID_HOME=/opt/android/sdk

RUN mkdir -p /opt/android/sdk/cmdline-tools/latest \
    && mv /opt/android/sdk/cmdline-tools/bin /opt/android/sdk/cmdline-tools/latest/ \
    && mv /opt/android/sdk/cmdline-tools/lib /opt/android/sdk/cmdline-tools/latest/ \
    && mv /opt/android/sdk/cmdline-tools/NOTICE.txt /opt/android/sdk/cmdline-tools/latest/ \
    && mv /opt/android/sdk/cmdline-tools/source.properties /opt/android/sdk/cmdline-tools/latest/ \
    && yes | /opt/android/sdk/cmdline-tools/latest/bin/sdkmanager --licenses \
    && /opt/android/sdk/cmdline-tools/latest/bin/sdkmanager \
    "platforms;android-36" \
    "build-tools;36.0.0" \
    "platform-tools" \
    "emulator" \
    "system-images;android-36.1;google_apis;x86_64"

# Android NDK r29.
ARG NDK_VERSION=r29
RUN mkdir -p /opt/android/ndk/android-ndk-${NDK_VERSION} \
    && curl -fsSLo /tmp/ndk.zip \
    https://dl.google.com/android/repository/android-ndk-${NDK_VERSION}-linux.zip \
    && unzip -q /tmp/ndk.zip -d /opt/android/ndk \
    && rm /tmp/ndk.zip

# Gradle.
ARG GRADLE_VERSION=9.4.1
RUN curl -fsSLo /tmp/gradle.zip \
    "https://services.gradle.org/distributions/gradle-${GRADLE_VERSION}-bin.zip" \
    && unzip -q /tmp/gradle.zip -d /opt \
    && ln -sf /opt/gradle-${GRADLE_VERSION}/bin/gradle /usr/local/bin/gradle \
    && rm /tmp/gradle.zip

ENV ANDROID_NDK_HOME=/opt/android/ndk/android-ndk-${NDK_VERSION}
ENV PATH=${EMSDK}:${EMSCRIPTEN_ROOT}:${ANDROID_HOME}/emulator:${ANDROID_HOME}/platform-tools:${ANDROID_NDK_HOME}:${PATH}

# Debug keystore so Android debug builds work without extra setup.
RUN mkdir -p /root/.android \
    && keytool -genkeypair \
    -v \
    -keystore /root/.android/debug.keystore \
    -storepass android \
    -alias androiddebugkey \
    -keypass android \
    -keyalg RSA \
    -keysize 2048 \
    -validity 10000 \
    -dname "CN=Android Debug, O=Android, C=US"
The Gradle Project
Android builds go through Gradle. Create an android/ directory at the project root with the standard structure:
android/
├── app/
│   ├── build.gradle.kts
│   └── src/main/
│       ├── AndroidManifest.xml
│       └── res/values/strings.xml
├── build.gradle.kts
├── settings.gradle
├── gradlew
├── gradlew.bat
└── gradle/wrapper/
    ├── gradle-wrapper.jar
    └── gradle-wrapper.properties
The key file is android/app/build.gradle.kts. It configures AGP (Android Gradle Plugin) to use CMake as the native build system, with vcpkg as the primary toolchain that chain-loads the NDK toolchain:
externalNativeBuild {
    cmake {
        val cmakeArgs = mutableListOf(
            "-DCMAKE_TOOLCHAIN_FILE=${rootDir.parentFile.absolutePath.replace('\\', '/')}/vcpkg/scripts/buildsystems/vcpkg.cmake",
            "-DVCPKG_CHAINLOAD_TOOLCHAIN_FILE=${ndkDirForCmake.ifEmpty { "\$ANDROID_NDK_HOME" }}/build/cmake/android.toolchain.cmake",
            "-DVCPKG_TARGET_TRIPLET=arm64-android",
            "-DVCPKG_HOST_TRIPLET=$vcpkgHostTriplet",
            "-DBUILD_SHARED_LIBS=OFF"
        )
        arguments(*cmakeArgs.toTypedArray())
        targets("hello-triangle")
    }
}
The AndroidManifest.xml uses NativeActivity so the C++ code is the entry point — no Java/Kotlin wrapper needed:
<activity
    android:name="android.app.NativeActivity"
    android:exported="true"
    android:configChanges="orientation|screenSize|screenLayout|keyboardHidden">
    <meta-data
        android:name="android.app.lib_name"
        android:value="hello-triangle" />
    <intent-filter>
        <action android:name="android.intent.action.MAIN" />
        <category android:name="android.intent.category.LAUNCHER" />
    </intent-filter>
</activity>
CMakeLists Changes for Android
The hello-triangle target becomes a shared library on Android (required by the JNI loader). It also links the Android system libraries that Raylib needs and force-exports the ANativeActivity_onCreate symbol:
if(ANDROID)
    add_library(${PROJECT_NAME} SHARED)
else()
    add_executable(${PROJECT_NAME})
endif()

# ... (sources, platform branching for Emscripten) ...

if(ANDROID)
    find_library(log-lib log)
    find_library(android-lib android)
    find_library(GLESv2-lib GLESv2)
    find_library(EGL-lib EGL)
    find_library(OpenSLES-lib OpenSLES)

    target_link_libraries(${PROJECT_NAME}
        PRIVATE
            ${log-lib}
            ${android-lib}
            ${GLESv2-lib}
            ${EGL-lib}
            ${OpenSLES-lib}
            atomic
    )

    target_link_options(${PROJECT_NAME}
        PRIVATE
            -u ANativeActivity_onCreate
    )
endif()
Update vcpkg.json to exclude GLFW on Android too (Raylib uses EGL directly):
{
    "name": "glfw3",
    "platform": "!emscripten & !android"
}
Building the APK
A cmake/build-apk.cmake script creates custom CMake targets that invoke Gradle and copy the resulting APKs to the install directory:
# Inside the Dev Container:
cmake --preset x64-linux-clang-arm64-android-debug
cmake --build --preset x64-linux-clang-arm64-android-debug
cmake --build --preset x64-linux-clang-arm64-android-debug --target apk-debug
The APK lands in build/<preset>/installed/android/ and can be installed on a connected device with adb install.
Step 8: macOS
macOS is a native target — no Dev Container needed. The main consideration is that Apple Clang still has incomplete C++23 support, so the project uses LLVM from Homebrew instead.
Requirements
- macOS (Apple Silicon)
- Xcode (for the macOS SDK and system headers)
- Homebrew — brew.sh
- LLVM 22 via Homebrew:
brew install llvm@22After installing, make sure the Homebrew LLVM is available. You don’t need to put it on your global PATH — the preset points to the full path directly.
Compiler Preset
The macOS compiler fragment differs from the Linux Clang fragment because it targets the Homebrew-installed LLVM and sets SDKROOT so the compiler can find macOS system headers:
// cmake/compiler/homebrew-clang.json
{
    "version": 7,
    "configurePresets": [
        {
            "name": "compiler-homebrew-clang",
            "hidden": true,
            "cacheVariables": {
                "CMAKE_EXPORT_COMPILE_COMMANDS": true,
                "CMAKE_CXX_COMPILER": "/opt/homebrew/opt/llvm@22/bin/clang++",
                "CMAKE_C_COMPILER": "/opt/homebrew/opt/llvm@22/bin/clang",
                "CMAKE_CXX_FLAGS": "-Wall -Wextra -Werror -pedantic",
                "CMAKE_C_FLAGS": "-Wall -Wextra -Werror -pedantic"
            },
            "environment": {
                "SDKROOT": "/Applications/Xcode.app/Contents/Developer/Platforms/MacOSX.platform/Developer/SDKs/MacOSX.sdk"
            }
        }
    ]
}
Using the absolute path to /opt/homebrew/opt/llvm@22/bin/clang++ means the preset works regardless of whether the Homebrew LLVM is on the user’s PATH. The SDKROOT environment variable tells Clang where to find the macOS SDK headers — without it, system includes like <cstdlib> won’t resolve.
Host and Target Fragments
The host fragment restricts the preset to Darwin systems, and the target sets the vcpkg triplet:
// cmake/host/arm64-macos.json
{
    "version": 7,
    "configurePresets": [
        {
            "name": "host-arm64-macos",
            "hidden": true,
            "condition": {
                "type": "equals",
                "lhs": "${hostSystemName}",
                "rhs": "Darwin"
            },
            "cacheVariables": {
                "VCPKG_HOST_TRIPLET": "arm64-osx"
            }
        }
    ]
}
// cmake/target/arm64-macos.json
{
"version": 7,
"configurePresets": [
{
"name": "target-arm64-macos",
"hidden": true,
"cacheVariables": {
"VCPKG_TARGET_TRIPLET": "arm64-osx"
}
}
]
}Platform File
The macOS platform file composes these into debug and release presets:
// cmake/platform/macos.json
{
    "version": 7,
    "include": [
        "../compiler/homebrew-clang.json",
        "../config/binaryDir.json",
        "../config/debug.json",
        "../config/ninja.json",
        "../config/release.json",
        "../config/vcpkg.json",
        "../host/arm64-macos.json",
        "../target/arm64-macos.json"
    ],
    "configurePresets": [
        {
            "name": "arm64-macos-clang-debug",
            "inherits": [
                "compiler-homebrew-clang",
                "config-binaryDir",
                "config-debug",
                "config-ninja",
                "config-vcpkg",
                "host-arm64-macos",
                "target-arm64-macos"
            ]
        },
        {
            "name": "arm64-macos-clang-release",
            "inherits": [
                "compiler-homebrew-clang",
                "config-binaryDir",
                "config-ninja",
                "config-release",
                "config-vcpkg",
                "host-arm64-macos",
                "target-arm64-macos"
            ]
        }
    ]
}
Building
Clone the repo, bootstrap vcpkg, and build:
git clone https://github.com/funnansoftware/cmake-platforms.git
cd cmake-platforms
git submodule update --init
./vcpkg/bootstrap-vcpkg.sh

cmake --preset arm64-macos-clang-debug
cmake --build --preset arm64-macos-clang-debug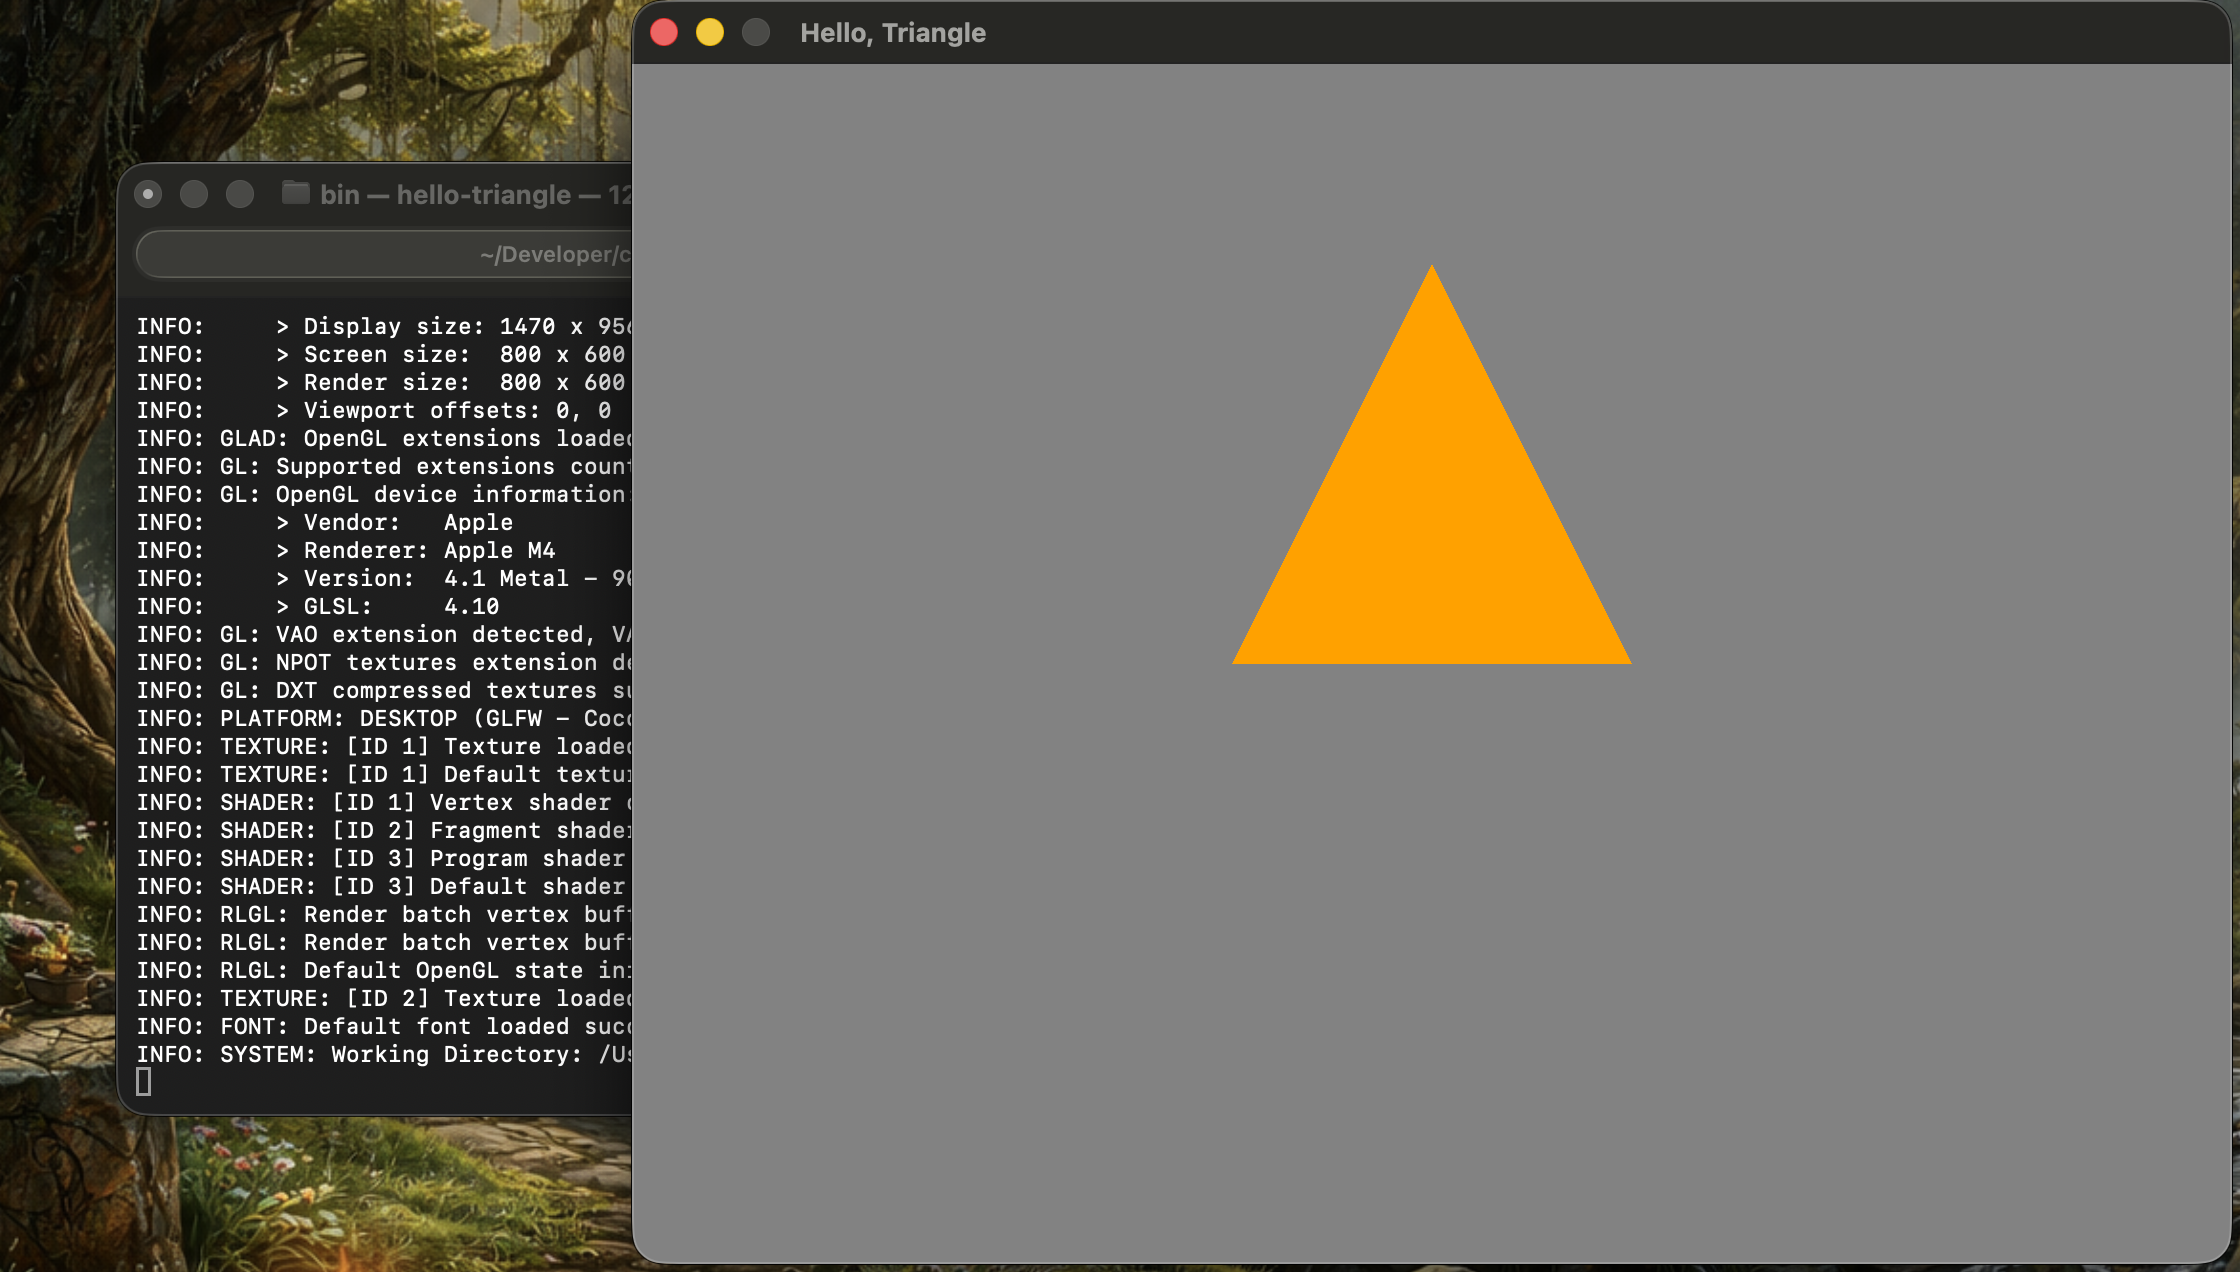
This is a good example of how the composable preset architecture pays off. Adding macOS meant creating three small JSON fragments (compiler, host, target) and one platform file that composes them — no changes to the CMakeLists or application code.
The Final Project Structure
After all platforms are in place, the project looks like this:
cmake-platforms/
├── CMakeLists.txt
├── CMakePresets.json
├── vcpkg.json
├── .clang-format
├── .devcontainer/
│   ├── Dockerfile
│   └── devcontainer.json
├── .vscode/
│   ├── settings.json
│   └── extensions.json
├── android/
│   ├── app/
│   │   ├── build.gradle.kts
│   │   └── src/main/
│   ├── build.gradle.kts
│   └── settings.gradle
├── app/
│   └── hello-triangle/
│       ├── CMakeLists.txt
│       └── main.cpp
├── cmake/
│   ├── build-apk.cmake
│   ├── compiler/
│   │   ├── android-ndk.json
│   │   ├── clang.json
│   │   ├── emcc.json
│   │   ├── gcc.json
│   │   ├── homebrew-clang.json
│   │   └── msvc.json
│   ├── config/
│   │   ├── binaryDir.json
│   │   ├── debug.json
│   │   ├── ninja.json
│   │   ├── release.json
│   │   └── vcpkg.json
│   ├── host/
│   │   ├── arm64-macos.json
│   │   ├── x64-linux.json
│   │   └── x64-windows.json
│   ├── platform/
│   │   ├── android.json
│   │   ├── linux.json
│   │   ├── macos.json
│   │   ├── wasm.json
│   │   └── windows.json
│   └── target/
│       ├── arm64-android.json
│       ├── arm64-macos.json
│       ├── wasm32-emscripten.json
│       ├── x64-linux.json
│       └── x64-windows.json
└── vcpkg/  (submodule)
And the root CMakePresets.json includes all five platforms:
{
    "version": 7,
    "include": [
        "./cmake/platform/android.json",
        "./cmake/platform/linux.json",
        "./cmake/platform/macos.json",
        "./cmake/platform/wasm.json",
        "./cmake/platform/windows.json"
    ]
}
Quick Reference: Build Commands
| Platform | Configure | Build |
|---|---|---|
| Windows (MSVC) | cmake --preset x64-windows-msvc-debug | cmake --build --preset x64-windows-msvc-debug |
| Linux (GCC) | cmake --preset x64-linux-gcc-debug | cmake --build --preset x64-linux-gcc-debug |
| Linux (Clang) | cmake --preset x64-linux-clang-debug | cmake --build --preset x64-linux-clang-debug |
| WebAssembly | cmake --preset wasm32-emscripten-debug | cmake --build --preset wasm32-emscripten-debug |
| macOS (Clang) | cmake --preset arm64-macos-clang-debug | cmake --build --preset arm64-macos-clang-debug |
| Android | cmake --preset x64-linux-clang-arm64-android-debug | cmake --build --preset x64-linux-clang-arm64-android-debug |
Every platform follows the same two-command pattern. The preset name is the only thing that changes.
Key Takeaways
-
Start with presets from the beginning. The composable JSON fragment approach scales without friction. Adding a new platform means adding a new platform file and a few fragments — no changes to existing code.
-
Dev Containers eliminate “works on my machine.” A Dockerfile that installs GCC, Clang, Emscripten, and the Android NDK gives every developer the exact same environment on any host OS.
-
vcpkg integrates naturally with CMake presets. Declare dependencies in
vcpkg.json, point the toolchain file in a preset fragment, and dependencies resolve automatically during configure. -
Platform branching in CMakeLists stays manageable. The
if(EMSCRIPTEN)/if(ANDROID)blocks are limited to link-time differences. The application code itself is unchanged across all five platforms. -
Invest in the Dockerfile. The container is the development environment. Getting it right means nobody is fighting with local toolchain installations.
The companion repository at funnansoftware/cmake-platforms has the complete working code. Each commit tracks one step of this guide — clone it, check out any point in the history, and verify for yourself.
Watch, Follow, and Join the Conversation
This post pairs with a livestream recording — the video at the top of the page walks through the whole project being built from scratch. If you want more like this:
- Watch live — I stream C++ and game-engine development on twitch.tv/funnansoftware.
- Catch up on YouTube — edited streams, devlogs, and how-to videos land on youtube.com/@funnansoftware.
- Join the Discord — questions, build issues, and general C++ chat at discord.gg/funnansoftware.
- Read the code — the full project source lives at funnansoftware/cmake-platforms.
If this guide helped you get a cross-platform build working, drop a note in Discord or a comment on the video — I’d love to hear what you’re targeting next.